Tuesday, May 24, 2011

Free Adult Spikes Hat Crochet Pattern


You can download the PDF here.


I have decided that it is a bit redundant to post the entire pattern on the post and then offer a PDF. If you do not have Adobe Reader, you can download it here (legally) for free. Who wants to copy and paste and then print anyway?  If you still have trouble downloading the PDF, please email me at ms.awesome.girl@gmail.com.


Hello Everyone! Thank you all for checking my blog. I hope you enjoy this pattern. It comes with both adult woman (20") and adult man (22") sizes.  It is crocheted with 2 colors of aran weight yarn with a recommended I hook.


I have made both sizes, but there still might be some errors. If you find one, please contact me at ms.awesome.girl@gmail.com Thanks!


Feel free to sell items made from this pattern. Please just credit me, Brittany Cole, as the designer and put a link back to my blog http://crafty-woman.blogspot.com/  If you have any questions, comments, or find any errors, please contact me at ms.awesome.girl@gmail.com Thanks and Happy Crocheting!

Saturday, May 21, 2011

Chain Free Crochet

I learned a new crocheting technique today!  I often feel that after doing something for so long, new ideas are few and far between. So, yay for learning something new!

I am really happy that I just found this site.  It teaches how to do chain free crochet.  This technique gives the edge of your work the ability to stretch, unlike when you start with a chain.  I think this will make it much easier to create hats that are worked from the brim up because you won't have that tight chain at the bottom.  

There are pages that teach no chain single crochet, half double crochet and double crochet.


Hope someone else finds this useful!

Thanks for looking and happy crocheting!

Tuesday, May 17, 2011

Pretty 6 Petal Flower


Here is my pattern for the Pretty 6 Petal Flower. 


You can download the PDF here


Please feel free to add this flower to your own patterns for hats, bags, etc. Please just credit me, Brittany Cole, as the designer and put a link back to my blog http://crafty-woman.blogspot.com/  If you have any questions, comments, or find any errors, please contact me at ms.awesome.girl@gmail.com Thanks and Happy Crocheting!

Pretty 6 Petal Flower


Skill Level


Materials

You can make these from scrap yarn of any gauge! Clear out that stash!
Any hook you want. Match it to your yarn.  You can make these flowers any size.
Yarn needle

Abbreviations

ch - chain
dc - double crochet
sc - single crochet
sl st - slip stitch
sp - space
st(s) - stitch(es)
tr - triple crochet

Pattern Notes

  • This pattern in written in American English terminology.
  • Instructions in *stars* are repeated the number of times indicated after the second *.


Instructions

Petals

Foundation Row: Make a magic ring. (Or ch 6 and join with sl st.) Ch 1. *Sc in loop. Ch 5* 6 times. Join with sl st to first sc. If you used a magic ring, pull the loop tight. (6 ch-5 sp)
Row 1: Sl st into first ch-5 sp. Ch 4. (Counts as tr.) 11 tr in same sp. *12 tr in next ch-5 sp* 5 times. Join with sl st to 4th ch of ch 4. Fasten off. Leave a long (12”) tail.

1) With the tail, catch the post of the first and the last tr of each petal. You will have 2 sts on one side of the yarn (the last stitch of one petal and the first stitch of the next petal) and 10 on the other side, 2 sts on the one side, 10 sts on the other side, etc.


2) Once  you have caught all 12 posts, pull until you can not see the yarn tail, but you still have a nice open space in the center. You can weave in the end or use it to attach the flower.

Center

Row 1: Ch 10. Dc in 3rd ch from hook and each st across. Fasten off. Leave 8” tail.  
For some of the smaller yarns, I made a shorter chain and sc instead of dc because the dc’s were to tall.

Use the tail to join the piece into a loop by sewing down the edges. Sew along the bottom, along the foundation chain, and pull tight to make a little bowl.


Leaves

Foundation Chain: Ch 12
Row 1: Sc in 2nd ch from hook. Hdc in next st. 2 dc in next st. Tr in next st. 2 Tr in next st. Tr in next st. Dc in next 2 sts. Hdc in next st. Sc in next st.  5 sc in last sc.

Now you will work around the end of the chain onto the back, unused loops of the foundation chain.


Sc in next st. Hdc in next st. Dc in next 2 sts. Tr in next st. 2 tr in next st. Tr in next st. 2 dc in next st. Hdc in next st. Sc in last st. Ch 1. Sl st into first sc and fasten off with a tail long enough to attach to your project.


Construction
Use the remaining length of yarn on the flower center to attach the center to the hole in the middle of the petals. Secure and weave in ends. Attach leaves where desired. Weave in ends.


Sunday, May 15, 2011

New Patterns Soon... I promise!!!

I have a few new patterns that will be coming out soon. I have so many ideas and I have to make each one right away so it doesn't fly away. I am just behind on testing =) I don't like to put anything up until it has been made at least twice.  Right now I have the Chain Link Hat, a purse, the Spikes Hat in Newborn to adult sizes and a cool iPad case all written and in the testing process.  Thank you all for your patience! Hope everyone has a great week!


Wednesday, May 11, 2011

Coming Soon - Chain Link Hat Pattern


Should be here in the next week or so.  Just doing final testing! Any comments?  Sorry the pics don't show the chain links very well. They look much better in person!

Tuesday, May 10, 2011

Thanks to everyone who volunteered!

Thank you everyone who volunteered to test patterns for me! I believe I have enough people at this point. I cannot create patterns fast enough for any more people!

Special thanks to Beckey, Stephanni and Amanda!

Hope everyone has a great day and happy crafting!

Monday, May 9, 2011

Free Slouchy Cross Stitch Bobble Beret

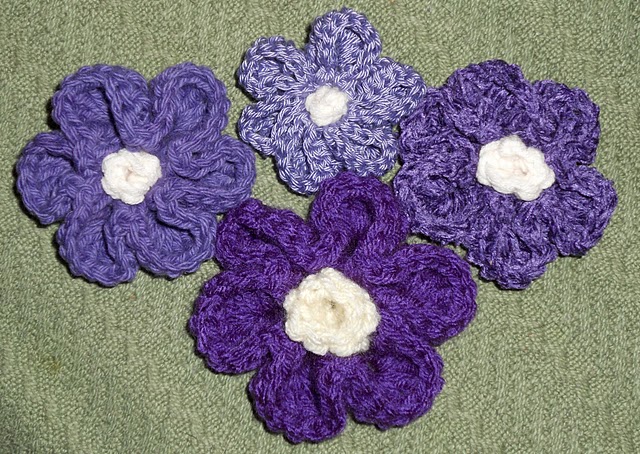
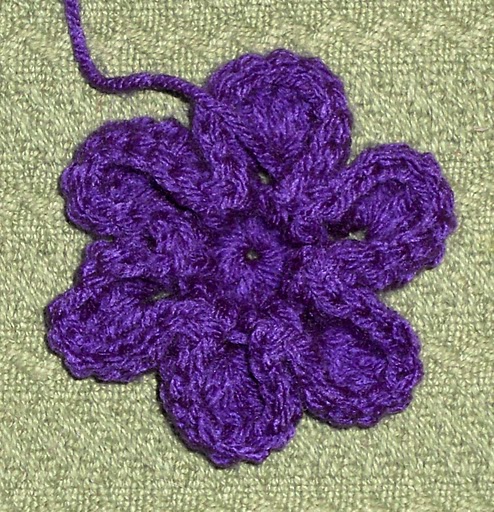
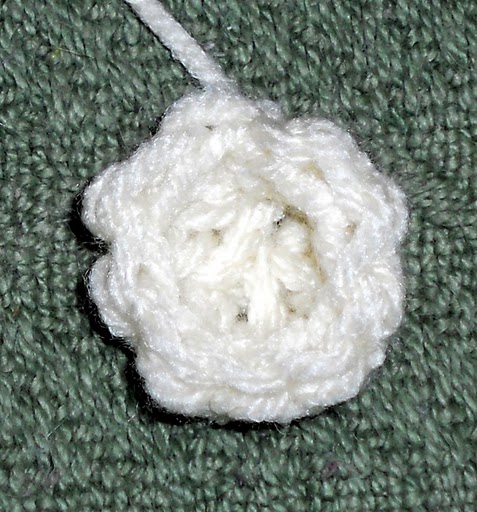
Please enjoy my pattern! If you find any errors or have any questions, please contact me at ms.awesome.girl@gmail.com. Thanks and happy crocheting!

If you would like to download the PDF you can click here.


Materials

1 skein size 4 worsted weight yarn (I used Caron Simply Soft in Berry Blue 9609)
Size J (6.00 mm) crochet hook or size needed to get correct gauge
Yarn needle


Gauge

6 sts = 2“ in sc
Row gauge is not important because it is a slouchy hat and you can make it as long as you would like.

Approximate Finished Dimensions

adult - 20” brim diameter x 12” height

Abbreviations

ch - chain
dc - double crochet
mb- make bobble
rs - right side
rsc - reverse single crochet
sc - single crochet
sc2tog - single crochet 2 stitches together
sl st - slip stitch
st(s) - stitch(es)
ws - wrong side
xst - cross stitch

Pattern Notes
This pattern in written in American English terminology.
Rounds are joined with a slip stitch. You will only turn the work when specified in the pattern. You will not turn the rest of the rows.
When you “Ch 2” at the beginning of a dc row, it does not count as a dc. When you join with a sl st at the end of a row be sure to join to the top of the first dc and not to the ch-2. If you are not careful about this, you will add stitches to your rounds.
After turning, when you crochet in the same st, it will seem like you are crocheting to the right a bit. This is correct. Also make sure not to crochet in the slip stitch you used to join the previous row. If you do, you will be adding stitches to your row.
Instructions in *stars* are repeated the number of times indicated after the second *.
If you are not familiar with the magic loop, here is a good tutorial to learn the technique http://www.crochetme.com/forums/t/28917.aspx If you are still not comfortable with the technique you can “Ch 2. 6 sc in second chain from hook. Join with a sl st.” instead.

Special Stitches

mb - make bobble - Yarn over and insert hook into designated stitch. Yarn over and draw a loop through the stitch. Yarn over and draw through 2 loops on the hook. You will now have 2 loops still on your hook. *Yarn over and insert hook into same stitch. Yarn over and draw a loop through the stitch. Yarn over and draw through 2 loops on the hook* 2 times. You will now have a total of four loops on the hook. Yarn over and draw through all 4 loops.

rsc - reverse single crochet - You will be crocheting from left to right when doing this stitch. It it takes a bit to get used to it. Insert hook into stitch to the right of current stitch. Yarn over and draw through stitch. Yarn over and draw through both loops on hook.

xst - cross stitch - Skip one st. Dc in next st. Dc in skipped stitch. This counts as 2 stitches.

Variations

You can make this hat longer by repeating rows 10 - 13 more times. Make sure to end on row 12 if you decide to add repeats.
You can also make this hat with aran weight yarn. The fabric will be stiffer and the hat will be a bit bulkier. The red hat is made with I Love This yarn from Hobby Lobby in #50 Cranberry.

Instructions

Foundation row: Form a magic loop. 6 sc in loop. Pull tight. Join with sl st to first sc. (6 sts)
Row 1: RS. Ch 1. 2 sc in same st. 2 sc in each st around. Join with sl st to first sc. (12 sts)
Row 2: Ch 1. Sc in same st. 2 sc in next st. *sc in next st, 2 sc in next st* 5 times. Join with sl st to first sc. (18 sts)
Row 3: Ch 1. Sc in same st. Sc in next st. 2 sc in next st. *sc in next 2 sts, 2 sc in next st* 5 times. Join with sl st to first sc. (24 sts)
Row 4: Ch 1. Sc in same st. Sc in next 2 sts. 2 sc in next st. *sc in next 3 sts, 2 sc in next st* 5 times. Join with sl st to first sc. TURN. (30 sts)
Row 5: WS. Ch 1. Sc in same st, mb in next stitch. *Sc in next st, mb in next st* 14 times. Join with sl st to first sc. (30 sts = 15 bobbles and 15 sc)
Row 6: Ch 2. Dc in same st. 2 dc in next st. *Dc in next st. 2 dc in next st* 14 times. Join with sl st to first dc. (45 sts)
Row 7: Ch 2. Dc in same st. Dc in next st. 2 dc in next st. *Dc in next 2 sts. 2 dc in next st* 14 times. Join with sl st to first dc. (60 sts)
Row 8: Ch 1. Sc in same st, mb in next stitch. *Sc in next st, mb in next st* 29 times. Join with sl st to first sc. TURN. (60 sts = 30 bobbles and 30 sc)
Row 9: RS. Ch 1. Sc in same st. Sc in next 3 sts. 2 sc in next st. *Sc in next 4 sts. 2 sc in next st* 11 times. Join with sl st to first dc. (72 sts)
Row 10: Ch 2. Dc in next st. Dc in skipped st with ch-2. Xst 35 times. Join with sl st. (72 sts)
Row 11: Ch 1. Sc in same st and each st around. Join with sl st to first sc. TURN. (72 sts)
Row 12: WS. Ch 1. Sc in same st, mb in next stitch. *Sc in next st, mb in next st* 35 times. Join with sl st to first sc. TURN. (72 sts = 36 bobbles and 36 sc)
Row 13: RS. Ch 1. Sc in same st and each st around. Join with sl st to first sc. (72 sts)
Rows 14 - 28: Repeat rows 10 - 13 three times and then rows 10 through 12 one more time.
Row 29: RS. Ch 1. Sc in same st. Sc in next 9 sts. Sc2tog. *Sc in next 10 sts. Sc2tog* 5 times. Join with sl st to first sc. (66 sts)
Row 30: Ch 2. Dc in next st. Dc in same st as ch-2. Xst 32 times. Join with sl st. (66 sts)
Row 31: Ch 1. Sc in same st. Sc in next 8 sts. Sc2tog. *Sc in next 9 sts. Sc2tog* 5 times. Join with sl st to first sc. TURN. (60 sts)
Row 32: WS. Ch 1. Sc in same st, mb in next stitch. *Sc in next st, mb in next st* 29 times. Join with sl st to first sc. TURN. (60 sts = 30 bobbles and 30 sc)
Rows 33 - 37: RS. Ch 1. Sc in same st and each st around. Join with sl st to first sc. (60 sts)
Row 38: Ch 1. Rsc in each st around. Fasten off and weave in ends. (60 sts)


This pattern is © Brittany Cole. You may not resell this pattern in whole or in part or claim it as your own. You may sell items created from this pattern locally or online. Please just give me credit as the designer. If you have any questions or find any errors, please contact me at ms.awesome.girl@gmail.com Thanks and happy crocheting!

Friday, May 6, 2011

Pattern Testers

Hello!

I was just wondering if anyone is interested in testing patterns for me. I find it difficult to accurately test patterns when they are already so ingrained in my brain. I like to do small projects, hence, all the hat patterns. I do a lot of baby and adult hats. If anyone is interested please contact me, Brittany Cole at ms.awesome.girl@gmail.com.

Thanks and hope you all have a great day!

Thursday, May 5, 2011

Free Baby Heart Bobble Beanie Pattern


Please enjoy my pattern. If you have any questions or find any errors, please contact me at ms.awesome.girl@gmail.com I am still new at pattern writing so please be patient. I have made all the sizes and reread the patterns a few times but I still might have missed something. Please feel free to sell hats made from this pattern. Just make sure to give me credit as the designer. Happy crocheting!!!


If you would like to download the PDF you can click here.

Materials
1 Skein Size 4 aran weight yarn (I used I Love This Yarn from Hobby Lobby)
Size J (6.00 mm) crochet hook or hook needed to get correct gauge

Gauge
6 sts = 2” in sc

Approximate Finished Dimensions
Newborn - 12” x 5”
0 - 3 months - 14” x 5.5”
3 - 6 months - 15” x 6”
6 - 12 months - 16” x 6.5”

Abbreviations
ch - chain
sc - single crochet
st(s) - stitch(es)
sl st - slip stitch
mb - make bobble
rem - remaining

Notes
This pattern in written in American English terminology.
Rounds are joined with a slip stitch. You will turn the work at the end of each round except where specified (at the end of the foundation row on each size and the row right before the last row.) You will turn the rest of the rows.
After turning, when you crochet your next st in the same st, it will seem like you are crocheting to the right a bit. This is correct. Also make sure not to crochet in the slip stitch you used to join the previous row. If you do you will be adding stitches to your row.

Instructions in *stars* are repeated the number of times indicated after the second *.
If you are not familiar with the magic loop, here is a
good tutorial to learn the technique http://www.crochetme.com/forums/t/28917.aspx If you are still not comfortable with the technique you can “Ch 2. 6 sc in second chain from hook. Join with a sl st.” instead.

Special Stitches
mb - make bobble - Yarn over and insert hook into designated stitch. Yarn over and draw a loop through the stitch. Yarn over and draw through 2 loops on the hook. You will now have 2 loops still on your hook. *Yarn over and insert hook into same stitch. Yarn over and draw a loop through the stitch. Yarn over and draw through 2 loops on the hook* 2 times. You will now have a total of four loops on the hook. Yarn over and draw through all 4 loops. Bobble complete!

rsc - reverse single crochet - You will be crocheting from left to right when doing this stitch. Insert hook into stitch to the right of current stitch. Yarn over and draw through stitch. Yarn over and draw through both loops on hook.
Instructions


Newborn

Foundation row: Form a magic loop. 6 sc in loop. Pull tight. Join with sl st to first sc. Do not turn. (6 sts)
Row 1: Ch 1. 2 sc in same st. 2 sc in each rem st around. Join with sl st to first sc. Turn. (12 sts)
Row 2: Ch 1. Sc in same st. 2 sc in next st. *sc in next st, 2 sc in next st* 5 times. Join with sl st to first sc. Turn. (18 sts)
Row 3: Ch 1. Sc in same st. Sc in next st. 2 sc in next st. *sc in next 2 sts, 2 sc in next st* 5 times. Join with sl st to first sc. Turn. (24 sts)
Row 4: Ch 1. Sc in same st. Sc in next 2 sts. 2 sc in next st. *sc in next 3 sts, 2 sc in next st* 5 times. Join with sl st to first sc. Turn. (30 sts)
Row 5: Ch 1. Sc in same st and each rem st around. Join with sl st to first sc. Turn. (30 sts)
Row 6: Ch 1. Sc in same st. Sc in next 3 sts. 2 sc in next st. *sc in next 4 sts, 2 sc in next st* 5 times. Join with sl st to first sc. Turn. (36 sts)
Row 7: Ch 1. Sc in same st and each rem st around. Join with sl st to first sc. Turn. (36 sts)
Row 8: Ch 1. Sc in same st and next 13 sts. Mb in next st. Sc in next st. Mb in next st. Sc in next 3 sts. Mb in next st. Sc in next st. Mb in next st. Sc in next 13 sts. Join with sl st to first sc. Turn. (36 sts = 32 sc and 4 bobbles)
Odd rows 9 - 17: Ch 1. Sc in same st and each rem st around. Join with sl st to first sc. Turn. (36 sts)
Row 10: Ch 1. Sc in same st and next 11 sts. Mb in next st. Sc in next 5 sts. Mb in next st. Sc in next 5 sts. Mb in next sc. Sc in next 11 sts. (36 sts = 34 sc and 2 bobbles)
Row 12: Ch 1. Sc in same st and next 12 sts. Mb in next st. Sc in next 9 sts. Mb in the next st. Sc in next 12 sts. (36 sts = 34 sc and 2 bobbles)
Row 14: Ch 1. Sc in same st and next 13 sts. Mb in next st. Sc in next 7 sts. Mb in the next st. Sc in next 13 sts. (36 sts = 34 sc and 2 bobbles)
Row 16: Ch 1. Sc in same st and next 15 sts. Mb in next st. Sc in next 3 sts. Mb in the next st. Sc in next 15 sts. (36 sts = 34 sc and 2 bobbles)
Row 18: Ch 1. Sc in same st and next 17 sts. Mb in next st. Sc in next 17 sts. (36 sts = 35 sc and 1 bobble)
Row 19: Ch 1. Sc in same st and each rem st around. Join with sl st to first sc. Turn. (36 sts)
Row 20: Ch 1. Sc in same st and each rem st around. Join with sl st to first sc. Do Not Turn. (36 sts)
Row 21: Ch 1. Rsc in each st around. Fasten off and weave in ends. (36 sts)


0 - 3 Months

Foundation row: Form a magic loop. 6 sc in loop. Pull tight. Join with sl st to first sc. Do not turn. (6 sts)
Row 1: Ch 1. 2 sc in same st. 2 sc in each rem st around. Join with sl st to first sc. Turn. (12 sts)
Row 2: Ch 1. Sc in same st. 2 sc in next st. *sc in next st, 2 sc in next st* 5 times. Join with sl st to first sc. Turn. (18 sts)
Row 3: Ch 1. Sc in same st. Sc in next st. 2 sc in next st. *sc in next 2 sts, 2 sc in next st* 5 times. Join with sl st to first sc. Turn. (24 sts)
Row 4: Ch 1. Sc in same st. Sc in next 2 sts. 2 sc in next st. *sc in next 3 sts, 2 sc in next st* 5 times. Join with sl st to first sc. Turn. (30 sts)
Row 5: Ch 1. Sc in same st and each rem st around. Join with sl st to first sc. Turn. (30 sts)
Row 6: Ch 1. Sc in same st. Sc in next 3 sts. 2 sc in next st. *sc in next 4 sts, 2 sc in next st* 5 times. Join with sl st to first sc. Turn. (36 sts)
Row 7: Ch 1. Sc in same st and each rem st around. Join with sl st to first sc. Turn. (36 sts)
Row 8: Ch 1. Sc in same st. Sc in next 4 sts. 2 sc in next st. *sc in next 5 sts, 2 sc in next st* 5 times. Join with sl st to first sc. Turn. (42 sts)
Row 9: Ch 1. Sc in same st and each rem st around. Join with sl st to first sc. Turn. (42 sts)
Row 10: Ch 1. Sc in same st and next 16 sts. Mb in next st. Sc in next st. Mb in next st. Sc in next 3 sts. Mb in next st. Sc in next st. Mb in next st. Sc in next 16 sts. Join with sl st to first sc. Turn. (42 sts = 38 sc and 4 bobbles)
Odd rows 11 - 19: Ch 1. Sc in same st and each rem st around. Join with sl st to first sc. Turn. (42 sts)
Row 12: Ch 1. Sc in same st and next 14 sts. Mb in next st. Sc in next 5 sts. Mb in next st. Sc in next 5 sts. Mb in next st. Sc in next 14 sts. (42 sts = 40 sc and 2 bobbles)
Row 14: Ch 1. Sc in same st and next 15 sts. Mb in next st. Sc in next 9 sts. Mb in next st. Sc in next 15 sts. (42 sts = 40 sc and 2 bobbles)
Row 16: Ch 1. Sc in same st and next 16 sts. Mb in next st. Sc in next 7 sts. Mb in next st. Sc in next 16 sts. (42 sts = 40 sc and 2 bobbles)
Row 18: Ch 1. Sc in same st and next 18 sts. Mb in next st. Sc in next 3 sts. Mb in next st. Sc in next 18 sts. (42 sts = 40 sc and 2 bobbles)
Row 20: Ch 1. Sc in same st and next 20 sts. Mb in next st. Sc in next 20 sts. (42 sts = 41 sc and 1 bobble)
Row 21: Ch 1. Sc in same st and each rem st around. Join with sl st to first sc. Turn. (42 sts)
Row 22: Ch 1. Sc in same st and each rem st around. Join with sl st to first sc. Do Not Turn. (42 sts)
Row 23: Ch 1. Rsc in each st around. Fasten off and weave in ends. (42 sts)


3 - 6 Months

Foundation row: Form a magic loop. 6 sc in loop. Pull tight. Join with sl st to first sc. Do not turn. (6 sts)
Row 1: Ch 1. 2 sc in same st. 2 sc in each rem st around. Join with sl st to first sc. Turn. (12 sts)
Row 2: Ch 1. Sc in same st. 2 sc in next st. *sc in next st, 2 sc in next st* 5 times. Join with sl st to first sc. Turn. (18 sts)
Row 3: Ch 1. Sc in same st. Sc in next st. 2 sc in next st. *sc in next 2 sts, 2 sc in next st* 5 times. Join with sl st to first sc. Turn. (24 sts)
Row 4: Ch 1. Sc in same st. Sc in next 2 sts. 2 sc in next st. *sc in next 3 sts, 2 sc in next st* 5 times. Join with sl st to first sc. Turn. (30 sts)
Row 5: Ch 1. Sc in same st and each rem st around. Join with sl st to first sc. Turn. (30 sts)
Row 6: Ch 1. Sc in same st. Sc in next 3 sts. 2 sc in next st. *sc in next 4 sts, 2 sc in next st* 5 times. Join with sl st to first sc. Turn. (36 sts)
Row 7: Ch 1. Sc in same st and each rem st around. Join with sl st to first sc. Turn. (36 sts)
Row 8: Ch 1. Sc in same st. Sc in next 4 sts. 2 sc in next st. *sc in next 5 sts, 2 sc in next st* 5 times. Join with sl st to first sc. Turn. (42 sts)
Row 9: Ch 1. Sc in same st and each rem st around. Join with sl st to first sc. Turn. (42 sts)
Row 10: Ch 1. Sc in same stitch and next 12 sts. 2 sc in next st. *Sc in next 13 sts. 2 sc in next st* 2 times. Join with sl st to first sc. Turn. (45 sts)
Row 11: Ch 1. Sc in same st and each rem st around. Join with sl st to first sc. Turn. (45 sts)
Row 12: Ch 1. Sc in same st and next 17 sts. Mb in next st. Sc in next st. Mb in next st. Sc in next 3 sts. Mb in next st. Sc in next st. Mb in next st. Sc in next 18 sts. Join with sl st to first sc. Turn. (45 sts = 41 sc and 4 bobbles)
Odd row 13 - 21: Ch 1. Sc in same st and each rem st around. Join with sl st to first sc. Turn. (45 sts)
Row 14: Ch 1. Sc in same st and next 15 sts. Mb in next st. Sc in next 5 sts. Mb in next st. Sc in next 5 sts. Mb in next sc. Sc in next 16 sts. (45 sts = 43 sc and 2 bobbles)
Row 16: Ch 1. Sc in same st and next 16 sts. Mb in next st. Sc in next 9 sts. Mb in next st. Sc in next 17 sts. (45 sts = 43 sc and 2 bobbles)
Row 18: Ch 1. Sc in same st and next 17 sts. Mb in next st. Sc in next 7 sts. Mb in next st. Sc in next 18 sts. (45 sts = 43 sc and 2 bobbles)
Row 20: Ch 1. Sc in same st and next 19 sts. Mb in next st. Sc in next 3 sts. Mb in next st. Sc in next 20 sts. (45 sts = 43 sc and 2 bobbles)
Row 22: Ch 1. Sc in same st and next 21 sts. Mb in next st. Sc in next 22 sts. (45 sts = 44 sc and 1 bobble)
Row 23: Ch 1. Sc in same st and each rem st around. Join with sl st to first sc. Turn. (45 sts)
Row 24: Ch 1. Sc in same st and each rem st around. Join with sl st to first sc. Do Not Turn. (45 sts)
Row 25: Ch 1. Rsc in each st around. Fasten off and weave in ends. (45 sts)


6 - 12 Months

Foundation row: Form a magic loop. 6 sc in loop. Pull tight. Join with sl st to first sc. Do not turn. (6 sts)
Row 1: Ch 1. 2 sc in same st. 2 sc in each rem st around. Join with sl st to first sc. Turn. (12 sts)
Row 2: Ch 1. Sc in same st. 2 sc in next st. *sc in next st, 2 sc in next st* 5 times. Join with sl st to first sc. Turn. (18 sts)
Row 3: Ch 1. Sc in same st. Sc in next st. 2 sc in next st. *sc in next 2 sts, 2 sc in next st* 5 times. Join with sl st to first sc. Turn. (24 sts)
Row 4: Ch 1. Sc in same st. Sc in next 2 sts. 2 sc in next st. *sc in next 3 sts, 2 sc in next st* 5 times. Join with sl st to first sc. Turn. (30 sts)
Row 5: Ch 1. Sc in same st and each rem st around. Join with sl st to first sc. Turn. (30 sts)
Row 6: Ch 1. Sc in same st. Sc in next 3 sts. 2 sc in next st. *sc in next 4 sts, 2 sc in next st* 5 times. Join with sl st to first sc. Turn. (36 sts)
Row 7: Ch 1. Sc in same st and each rem st around. Join with sl st to first sc. Turn. (36 sts)
Row 8: Ch 1. Sc in same st. Sc in next 4 sts. 2 sc in next st. *sc in next 5 sts, 2 sc in next st* 5 times. Join with sl st to first sc. Turn. (42 sts)
Row 9: Ch 1. Sc in same st and each rem st around. Join with sl st to first sc. Turn. (42 sts)
Row 10: Ch 1. Sc in same st. Sc in next 5 sts. 2 sc in next st. *sc in next 6 sts, 2 sc in next st* 5 times. Join with sl st to first sc. Turn. (48 sts)
Rows 11 - 13: Ch 1. Sc in same st and each rem st around. Join with sl st to first sc. Turn. (42 sts)
Row 14: Ch 1. Sc in same st and next 19 sts. Mb in next st. Sc in next st. Mb in next st. Sc in next 3 sts. Mb in next st. Sc in next st. Mb in next st. Sc in next 19 sts. Join with sl st to first sc. Turn. (48 sts = 44 sc and 4 bobbles)
Row 16: Ch 1. Sc in same st and next 17 sts. Mb in next st. Sc in next 5 sts. Mb in next st. Sc in next 5 sts. Mb in next sc. Sc in next 17 sts. (48 sts = 46 sc and 2 bobbles)
Row 18: Ch 1. Sc in same st and next 18 sts. Mb in next st. Sc in next 9 sts. Mb in next st. Sc in next 18 sts. (48 sts = 46 sc and 2 bobbles)
Row 20: Ch 1. Sc in same st and next 19 sts. Mb in next st. Sc in next 7 sts. Mb in next st. Sc in next 19 sts. (48 sts = 46 sc and 2 bobbles)
Row 22: Ch 1. Sc in same st and next 21 sts. Mb in next st. Sc in next 3 sts. Mb in next st. Sc in next 21 sts. (48 sts = 46 sc and 2 bobbles)
Row 24: Ch 1. Sc in same st and next 23 sts. Mb in next st. Sc in next 23 sts. (48 sts = 47 sc and 1 bobble)
Rows 25: Ch 1. Sc in same st and each rem st around. Join with sl st to first sc. Turn. Fasten off and weave in ends.
Row 26: Ch 1. Sc in same st and each rem st around. Join with sl st to first sc. Do Not Turn. (48 sts)
Row 27: Ch 1. Rsc in each st around. Fasten off and weave in ends. (48 sts)


This pattern is © Brittany Cole. You may not resell this pattern in whole or in part or claim it as your own. You may sell items created from this pattern locally or online. Please just give me credit as the designer. If you have any questions or find any errors, please contact me at ms.awesome.girl@gmail.com Thanks and happy crocheting!

Sunday, May 1, 2011

Free Basic Super Bulky Beanie Pattern


Here it is! Another free pattern. This hat has plenty of stretch. They fit both me and my husband comfortably.

Please contact me with any questions or errors that you find. My email is ms.awesome.girl@gmail.com You may sell items made from this pattern. Please just give me credit as the designer. Thanks for downloading and Happy Crocheting!

If you would like to download the PDF you can click here.

Materials
1 skein size 6 super bulky yarn (I used Lion Brand Hometown USA 4.94 ounces/81 yards)
Size L (8.00 mm) crochet hook or hook needed to get correct gauge
Yarn needle

Gauge
9 sts = 5” in dc

Approximate Finished Dimensions
Adult 20” x 8.5”

Abbreviations
ch - chain
sc - single crochet
st(s) - stitch(es)
sl st - slip stitch
dc - double crochet
rem - remaining

Notes
This pattern in written in American English terminology.
Rounds are joined with a slip stitch. Do not turn.
Instructions in *stars* are repeated the number of times indicated after the second *.
If you are not familiar with the magic loop, here is a good tutorial to learn the technique http://www.crochetme.com/forums/t/28917.aspx If you are still not comfortable with the technique you can chain 4 and join with a slip stitch instead.
Ch 2 at the beginning of a row does not count as a dc. I find that using a ch 2 and then dc in the same stitch keeps from getting the little gaps that often show at joins. Make sure to join to the top of the dc and not the 2nd ch of the ch 2 or you will be adding extra sts. If you do not like this technique, feel free to use a ch 2 or ch 3 as your first st and then finish the row as normal.


Instructions
Foundation Row: Form a magic loop. 6 sc in loop. Pull tight. Join with sl st to first sc. (6 sts)
Row 1: Ch 1. 2 sc in same stitch and each st around. Join with sl st to first sc. (12 sts)
Row 2: Ch 2. Dc in same st. 2 dc in next st. *Dc in next st. 2 dc in next st* 5 times. Join with sl st to first dc. (18 sts)
Row 3: Ch 2. Dc in same st. Dc in next st. 2 dc in next st. *Dc in next 2 sts. 2 dc in next st* 5 times. Join with sl st to first dc. (24 sts)
Row 4: Ch 2. Dc in same st. Dc in next 2 sts. 2 dc in next st. *Dc in next 3 sts. 2 dc in next st* 5 times. Join with sl st to first dc. (30 sts)
Row 5: Ch 2. Dc in same st. Dc in next 3 sts. 2 dc in next st. *Dc in next 4 sts. 2 dc in next st* 5 times. Join with sl st to first dc. (36 sts)
Rows 6 - 9: Ch 2. Dc in same st and in each rem st around. Join with sl st to first dc. (36 sts)
Rows 10 - 11: Ch 1. Sc in same st and each rem st around. Join with sl st to first sc. (36 sts)
Fasten off and weave in ends.